Montessori Activities for 2-Year-Olds: 12 Ideas That Actually Work (No Special Toys Needed)
Two is a strange age to parent.
Your child has opinions — loud ones. They want to do everything themselves (until they don’t). They can follow a two-step instruction (sometimes). They’re building language at a pace that still surprises you. And they’re somewhere in the messy middle ground between baby and kid, where activities from six months ago are boring and activities from their older sibling are still too much.
The good news: this is one of the richest windows for Montessori work at home. A two-year-old is in what Maria Montessori called the sensitive period for order — they crave sequence, repetition, and predictability. They want to participate in real life. They’re fascinated by anything that involves pouring, sorting, matching, or helping.
The bad news: they’ll also dump the beans on the floor and declare “all done” after ninety seconds. That’s normal. That’s the age.
Here are 12 activities that are genuinely right for where 2-year-olds are developmentally — most requiring nothing more than what you already have at home.
Affiliate disclosure: Some links in this post are affiliate links. We may earn a small commission if you buy through them, at no extra cost to you. We only link to products we’d genuinely recommend.
What’s Different at Age 2 (vs 18 Months)?
Before the list, a quick developmental note — because it changes which activities actually work.
At 18 months, children are mostly in the cause-and-effect phase. Put in a hole. Pour from a jug. Drop into water. They’re learning what things do.
At 2, they’ve crossed into intentional action. They now want to complete a task, not just explore it. They’ll notice if you put the red circle back in the wrong spot. They’ll tell you “no, that way.” They’re developing what Montessori called purposeful work — activities with a clear beginning, middle, and end that they can control.
This is why many 18-month-olds find a puzzle frustrating (too much failure), and many 2-year-olds find a baby toy insulting (not enough challenge). The sweet spot is activities with a clear task structure and achievable difficulty.
The 12 Activities
1. Tong Transfer
What you need: Child-sized tongs (silicone-tipped kitchen tongs work well), two bowls or muffin tins, objects to transfer — pompoms, small balls, large marbles, or balled-up socks.
How to do it: Set up the two containers side by side on a tray. Show your child slowly how to open the tongs, grip an object, and release it into the other container. Hand them the tongs and let them try.
Why it works: Tongs require more coordination than a spoon — you need to control the opening and closing motion while directing your hand. For a 2-year-old, this is a genuinely challenging fine motor task. It also has a satisfying completion: all objects transferred, then back again.
What they’re building: Pincer grip (writing prep), hand-eye coordination, concentration, the satisfaction of completing a self-contained task.
Tips: Silicon-tipped kitchen tongs are better than plastic toy versions — they grip reliably. If tongs are too hard, start with a spoon transfer (same setup, lower difficulty). If tongs are too easy, try tongs + smaller objects.
Real ASIN worth mentioning: The Oxo Tot Salad Hands (~$10) are perfectly sized for small hands and have a satisfying spring action. You’ll also use them for salad.
2. Colour Sorting
What you need: Coloured objects (duplo blocks, coloured bottle caps, pompoms, coloured buttons) and small containers — one per colour. Muffin tins or egg cups work well.
How to do it: Mix the objects in a central bowl. Put one sample of each colour in each container (this establishes the sorting key). Show your child how to pick an object, match it to the correct container, and place it. Then let them continue.
Why it works: Sorting is one of the earliest mathematical activities in Montessori. At 2, most children can match two to four colours reliably. This activity gives them control over a concrete, visually satisfying sorting task with no “wrong” answer to worry about.
What they’re building: Early maths (categorisation, matching), colour recognition, concentration, order.
Tips: Start with two colours, max. Add a third when they master two without thinking about it. The activity scales all the way to six or eight colours as they get older. And don’t correct “mistakes” — if they put the orange pompom in the red bowl, let them notice the difference themselves (or not).
3. Practical Life: Washing Fruit
What you need: A small bowl of water, a soft brush (like a vegetable brush), a dish towel, some fruit that actually needs washing (grapes, strawberries, cherry tomatoes, small apples).
How to do it: Set everything up at counter or table height, or on a stable stool at the sink. Show your child how to hold a piece of fruit, dip it in the water, brush it gently, and set it on the towel to dry. Then step back.
Why it works: This is classic Montessori practical life — real work with a real purpose. Your child is preparing food that will actually be eaten. That’s not play-pretend. At 2, this distinction matters enormously; they want to contribute, not just imitate.
What they’re building: Practical life skills, hand strength, sequencing, purpose, independence.
Tips: Let them eat the fruit when they’re done. The pride of eating something they prepared is half the point. A child who washes their own grapes will eat twice as many grapes.
4. Sticker Matching
What you need: A sheet of large stickers (coloured dots, or simple shapes), and a piece of paper with the same shapes/colours drawn or pre-printed.
How to do it: Draw or print a simple grid of the shapes/colours. Give your child the sticker sheet. Show them how to peel a sticker and match it to the corresponding spot on the paper. Let them fill the whole sheet.
Why it works: Peeling stickers is actually hard at 2 — it requires finding the edge, applying controlled upward pressure, and then placing the sticker accurately. This is a lot of fine motor demand in one short activity. And stickers feel exciting. Montessori-trained? Possibly not. Genuinely effective? Yes.
What they’re building: Fine motor skills (peeling, precision placement), matching and categorisation, colour/shape recognition, sense of completion.
Tips: Use large stickers — the tiny circular ones are genuinely difficult for 2-year-old fingers. Avery dot stickers in 3/4” size are the right starting point. Prepare the sheet the night before to have it ready quickly.
5. Cutting with Safety Scissors
What you need: Child-sized safety scissors (spring-loaded are much easier to start), strips of thick paper (cardstock), or playdough “snakes” if cutting paper is too frustrating.
How to do it: Show your child how to hold the scissors with their dominant hand (thumb in the top loop, fingers below). With your other hand, hold the paper. Make one snip to demonstrate the cut. Hand them the scissors. Hold the paper for them at first while they cut across it. Over time, move toward them controlling both scissors and paper.
Why it works: Scissors work is in virtually every Montessori environment for children 2 and older, and for good reason. The hand motion required (opening and closing the scissors while guiding them) is some of the most sophisticated fine motor work in the curriculum. And children absolutely love cutting things.
What they’re building: Hand strength, bilateral coordination, fine motor control, concentration, confidence.
Tips: Spring-loaded safety scissors are non-negotiable at this age. Regular scissors are too difficult — the spring mechanism does half the work so your child can focus on the cutting direction. The Fiskars Easy Action Kids Scissors (~$7) are widely used in Montessori classrooms and hold up well.
6. Simple Puzzles (6–12 Pieces, Knobbed or Peg-Style)
What you need: A wooden knob puzzle (with 6-12 pieces) or a simple floor puzzle with large pieces. Avoid 24-piece puzzles — they’re too frustrating at this age.
How to do it: Remove all pieces from the puzzle. Show your child how one piece fits in. Return it slowly, rotating it until it clicks into place. Let them try with one piece at a time. If they get frustrated, you can demonstrate how a piece rotates to fit.
Why it works: Puzzles at this level are pure Montessori three-period lesson territory — the child holds the shape, tries orientations, experiences success or failure, and self-corrects. There’s no ambiguity. The piece either fits or it doesn’t. The built-in control of error is pedagogically clean.
What they’re building: Spatial reasoning, shape recognition, problem-solving, persistence, hand-eye coordination.
Tips: Store puzzles in a way that makes getting them out and putting them away independently possible. Stacking puzzles in a pile teaches nothing. Displaying them on a low shelf (one per slot) means your child can choose, complete, and return them independently.
7. Object-to-Picture Matching
What you need: 4-6 small household objects (a spoon, a small rock, a leaf, a button, a crayon, a coin) and printed or drawn pictures of those exact objects on index cards.
How to do it: Lay the picture cards on a tray. Place the objects in a basket. Show your child how to pick an object, look for its matching picture, and place it on the card. The objects don’t need to be identical to the pictures — just recognisably the same thing.
Why it works: This is early language and categorisation work. The child is making the mental leap between a real three-dimensional object and its two-dimensional representation — which is genuinely abstract, and an important precursor to reading.
What they’re building: Language, categorisation, abstract thinking, vocabulary (you name each object as you model), attention.
Tips: You can evolve this activity as they get older — from objects to pictures, then pictures to pictures, then pictures to written words. It’s a Montessori language curriculum in miniature. For now, concrete objects to clear pictures is the right level.
8. Water Transferring with a Turkey Baster or Dropper
What you need: A small turkey baster or bulb dropper, two bowls, water. Optional: add food colouring to make the transfer visually obvious.
How to do it: Fill one bowl with water (coloured is more engaging). Show your child how to squeeze the baster, put the tip in the water, release — and watch the water fill the baster. Then hold it over the empty bowl and squeeze to release. Let them try.
Why it works: The turkey baster requires more hand strength and coordination than a cup or spoon. At 2, this is the right level of challenge. It’s also remarkably satisfying — the water moves visibly and quickly, and there’s a direct cause-and-effect relationship between squeeze and result.
What they’re building: Hand strength, fine motor control, scientific thinking (volume, cause and effect), concentration.
Tips: Put everything on a tray with a lip — spills will happen and the tray keeps them contained. Include a small sponge or cloth on the tray from the start to teach clean-up as part of the activity, not an afterthought.
9. Dressing Practice Frame (or DIY Version)
What you need: A “dressing frame” — either a proper Montessori dressing frame (available from specialist suppliers) or a piece of fabric and a coat hanger with a large button and buttonhole, or a zip. Alternatively: one of your own old shirts with large buttons.
How to do it: Show your child slowly how to push the button through the hole (or open and close the zip). Let them practise. There’s no end product — the activity is the activity. They button it, unbutton it, and repeat.
Why it works: Buttoning is a prerequisite to self-dressing, and self-dressing is a huge source of Montessori independence pride. The isolated, repeatable nature of a dressing frame means they can practise the movement without the frustration of being cold or late while learning.
What they’re building: Fine motor skills (enormous for buttons), independence, self-care preparation, concentration.
Tips: If you don’t have a formal dressing frame, a coat hanger with a fabric panel works fine. The key is that it’s stable — the child shouldn’t be struggling to hold the fabric still and work the button simultaneously. Large buttons are mandatory; small ones are too frustrating.
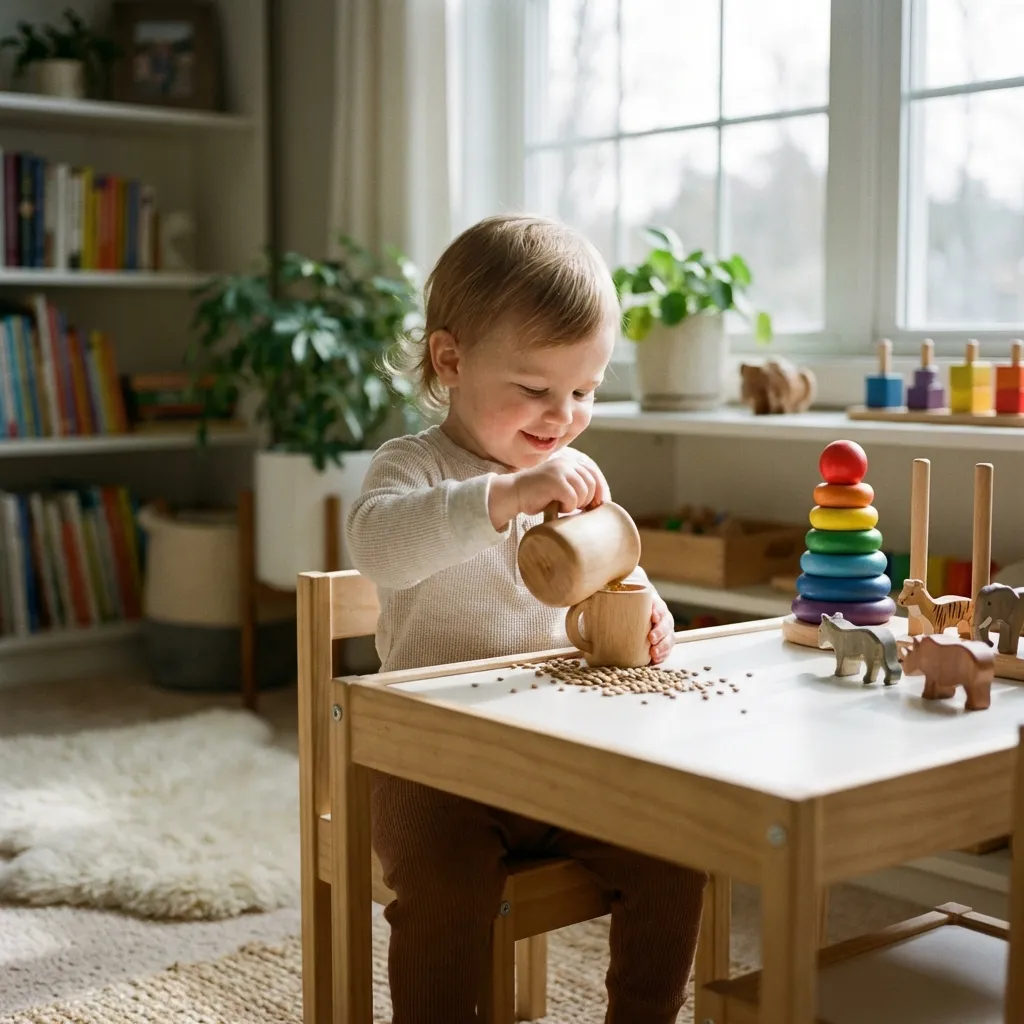
10. Spooning Dry Materials into Containers
What you need: A tray, two bowls, a spoon, and a dry material — dried lentils, large dried pasta, dried chickpeas, or rice (for more advanced children). A small brush and dustpan for spills.
How to do it: Fill one bowl. Show your child how to scoop with the spoon, carry it without spilling, and empty it into the second bowl. When the first bowl is empty, transfer back. Include the small brush to sweep up spills as part of the activity.
Why it works: This is the 2-year-old evolution of the 18-month spoon transfer — same core activity, but with more expectation around neatness and self-correction. At 2, children can begin to focus on not spilling, which means they’re controlling their movements more deliberately.
What they’re building: Fine motor control, hand steadiness, concentration, sequential thinking, practical life (sweep-up).
Tips: This is covered in more detail in our Montessori Activities for 18-Month-Olds post — if you’re coming from there, this is the next level. Lentils are harder than pasta; rice is the final boss.
11. Sound Matching (DIY Shakers)
What you need: 8 identical small containers (film canisters, small spice jars, or matchboxes all work). 4 different materials to fill them: rice, dried beans, small pebbles, sand. Fill pairs with matching amounts of each material. Seal well.
How to do it: Shake one container and listen. Find its matching pair by shaking others. Place matches together. That’s the complete activity.
Why it works: This is Montessori sound cylinder work at home. It develops auditory discrimination — which is a direct precursor to phonemic awareness and reading. It’s also unusual enough that it captures attention well. Two-year-olds find it genuinely magical that two containers sound the same.
What they’re building: Auditory discrimination, matching, concentration, early language/reading preparation.
Tips: Seal the containers very well — if one leaks and the child sees the contents, the challenge disappears. Also, keep the material differences distinct: rice vs sand is too similar in sound, but rice vs dried beans vs pebbles vs a single marble are clearly different.
12. Simple Nature Table
What you need: A low tray or shelf, collected items from outside — leaves, sticks, small stones, a pinecone, a feather, a seed pod. Change it seasonally (or weekly).
How to do it: Take a walk and collect together. Set up the tray at child height. Let your child arrange and rearrange the items as they like. You can add a small magnifying glass, a notebook for “drawings,” and simple picture reference cards (pine tree, oak leaf).
Why it works: The nature table isn’t a single activity — it’s a continuously available invitation to observe, classify, and wonder. It teaches that the world outside is worth paying attention to, and it naturally evolves every season. It’s also essentially free.
What they’re building: Scientific observation, vocabulary, classification, care for nature, patience.
Tips: Include your child in the collecting, not just the displaying. The ownership of having found the pinecone themselves makes them far more likely to engage with it on the tray. Introduce one item at a time with a name and a brief observation (“this is an acorn — it’s a seed from an oak tree”).
Setting Up for Success at Age 2
Keep activities on a low, accessible shelf. Two-year-olds should be able to choose their own activity, take it to a table, and return it when they’re done — all independently. If they have to ask you to get something down, the independence is compromised.
Short = successful. Ninety seconds of focused work is a good outcome at age 2. Don’t push for longer. The concentration develops gradually; your job is to create the conditions, not the duration.
Model once, then step back. Show the activity slowly, clearly, and mostly without words. Then let them try. Don’t correct, hover, or guide unless they ask. The struggle is the point.
Include clean-up as part of the work. A sponge on the tray, a small brush for spills, a place to put things back — these aren’t afterthoughts. They’re core to the independence message: you started it, you finish it, you leave it ready for next time.
Rotate regularly. After about a week, most 2-year-olds have exhausted their interest in a given setup. Swap it out, even if you just modify it slightly (new material, new containers). The newness is part of the draw.
If you’re looking for good toys to complement these activities rather than replace them, our Montessori Toys for 2-Year-Olds guide covers the products worth investing in at this stage, with honest assessments of what’s worth the price and what isn’t.
Frequently Asked Questions
What Montessori activities are best for a 2-year-old?
The best activities for 2-year-olds are practical life activities (washing fruit, spooning, pouring), fine motor work (tongs, scissors, dressing frames), and early cognitive activities like sorting and matching. At 2, children want to do real work — activities with a clear task, a clear end, and a result they can see. Avoid activities that are too open-ended (frustrating) or too simple (boring).
How long should a 2-year-old concentrate on an activity?
Typically 3-15 minutes, depending on the child, the time of day, and how interesting the activity is. Don’t interrupt focused concentration, even if it looks like they’re “just” repeating the same action over and over. That repetition is how they build skill and neural pathways. If they walk away after 2 minutes, that’s fine too — they got what they needed.
Do I need special Montessori toys for a 2-year-old?
No. The activities in this post use household items. That said, a few targeted materials — quality tongs, spring-loaded safety scissors, a knob puzzle — are genuinely worth having because they provide the right level of challenge for the age. You don’t need a full Montessori shelf setup; you need a few thoughtful materials and a bit of floor space.
What’s the difference between Montessori activities for 18 months and 2 years?
At 18 months, children are in the cause-and-effect phase — they’re learning what things do. At 2, they’ve moved into purposeful work — they want to complete tasks with a clear structure and a defined endpoint. Activities can be more complex (tongs instead of spoons, scissors, multi-step sequencing) and there’s more expectation around concentration and self-correction. See our Montessori Activities for 18-Month-Olds post for the earlier stage.
My 2-year-old just throws everything. Is Montessori right for them?
Yes — but the throwing usually signals that the activity is too easy, too frustrating, or that they need a reset (tired, hungry, overstimulated). Try: presenting at a calm time of day, offering fewer activities at once, choosing something with a clear and satisfying completion, and making sure they have enough time outdoors first. Physical output before fine motor work makes a real difference.
How many activities should I set up at once?
Two or three is plenty. Offering too many options creates the toy-box problem — everything looks equally uninteresting. A small, curated selection on a low shelf means each item gets real attention. Rotate regularly (every few days to a week) rather than having everything available all the time.
Looking for the next stage? See our Montessori Activities for 3-4-Year-Olds guide — the cognitive complexity increases significantly once language takes off.
 Get weekly Montessori tips
Honest reviews, activity ideas, and budget-friendly picks — no spam, just what works.
Subscribe Free