Montessori Process Art for Toddlers: 10 Activities Using Natural Materials
There’s a version of toddler art that looks like this: a printout colouring page, a set of stickers, a craft kit from a supermarket. Everything pre-planned, pre-cut, pre-decided. The child fills in the blanks.
That’s not what this guide is about.
Montessori process art is the opposite. No template, no expected outcome, no “here’s what it should look like when you’re done.” The process is the point — the sensation of pressing a flower against paper, watching colour bleed into wet paper, seeing a leaf’s veins appear like magic in a print. What comes out at the end is secondary. What happens in the doing is everything.
And spring is the ideal season for it. Your garden, a walk in the park, even the roadside — they’re all suddenly full of materials. Dandelions, petals, moss, leaves of every shape, bark with interesting textures, feathers. All free. All biodegradable. All genuinely interesting to a toddler’s hands.
This guide covers 10 process art activities that use natural spring materials. Most need nothing you don’t already have. All of them respect what Montessori understood about how young children learn: through their senses, through repetition, and through the freedom to explore without being corrected.
For more spring ideas that go beyond art, see our Montessori Spring Activities guide. For outdoor nature work, Outdoor Montessori Nature Activities is a good companion. For practical life in spring, see Montessori Practical Life Activities.
Why Process Art Fits the Montessori Approach
Maria Montessori wrote about the importance of sensorial exploration — the idea that young children learn by touching, handling, observing, and investigating real materials. Art, in the Montessori sense, isn’t craft. It isn’t making something “nice.” It’s exploratory work with materials that have interesting properties.
A flower petal has texture, colour, moisture, and fragility. A leaf has a structure you can feel with your fingertip. Wet paint moves differently from dry paint. Sponge feels different from brush. These observations are scientific as much as aesthetic.
Why “process” matters more than “product”:
When we focus on the product — “let’s make a butterfly card for grandma” — we introduce an external standard. The child’s work is evaluated against that standard. Anything that doesn’t look right gets “helped” toward the expected result. The message is: your spontaneous exploration was wrong.
Process art removes the standard. There is no wrong outcome. There’s only what happened, what you noticed, what you tried. A toddler who smears red paint in a circle and then stamps a dandelion on top has made something entirely their own — and has paid close attention while doing it.
This is also why adults should resist commenting on the aesthetics. “That’s beautiful!” is just as unhelpful as “that’s a bit messy.” Neither tells the child anything useful. Better: “You used a lot of blue there” or “You pressed really hard on that leaf” or simply saying nothing and letting them work.
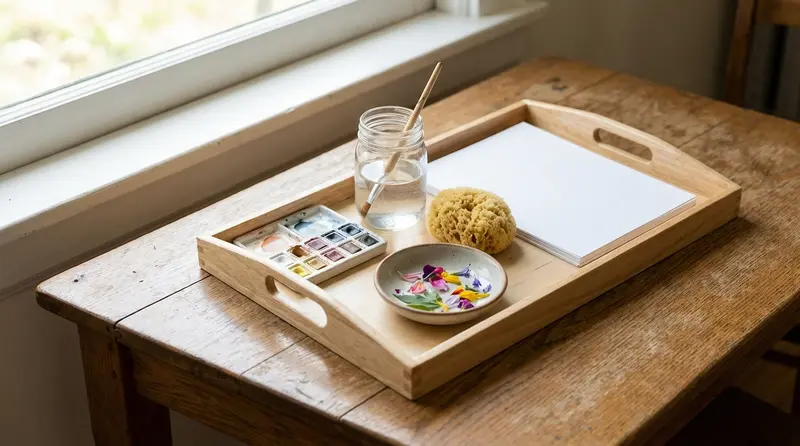
Setting Up Your Process Art Space
Before the activities: a note on setup, because the prepared environment matters here.
What you need (the basics):
- A low table or a tray on the floor at their height
- A smock or old clothes (required — this will be messy)
- A tray with a lip to contain materials and spills
- A limited palette — 2-3 colours is better than 12 for young children
What to collect from outside:
- Flowers with flat heads: daisies, pansies, dandelions, buttercups
- Leaves of different shapes and sizes (smooth, textured, lobed, narrow)
- Bark fragments with texture
- Feathers
- Grass blades, ferns, seed pods
- Moss (for sponge-like printing)
A note on non-toxic materials:
For children who still mouth things, keep art sessions short and supervised. Standard washable watercolour paints are non-toxic and safe. Avoid oil-based paints, permanent inks, and treated papers with chemical coatings. When in doubt, choose food-safe options: turmeric, beetroot juice, and berry juice make excellent natural pigments for the youngest artists.
The 10 Activities
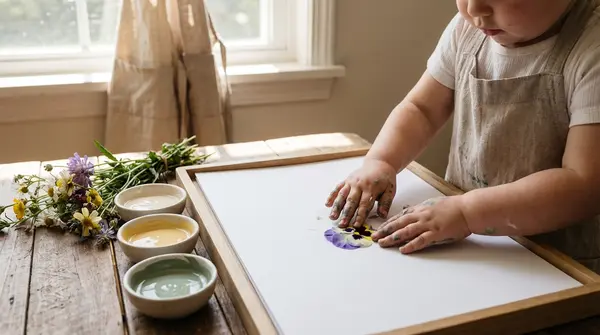
1. Flower Printing
Age: 18 months+
Time: 10–30 minutes
What you need: Fresh-cut flowers (daisies, dandelions, pansies), watercolour paint or liquid tempera, paper, a shallow tray or plate for the paint
How it works: Pour a thin layer of paint into the tray. Show your child how to press a flower head face-down into the paint, then press it gently onto the paper. Lift. Repeat. Try different flowers, different colours, different pressure levels.
What to notice: The petal texture transfers differently depending on the flower. A daisy makes a spoked print. A dandelion makes a fuzz of dots. A pansy leaves a face-like impression. If you have a magnifying glass nearby, let them look at the real flower and then the print — this is an observation activity as much as an art one.
The variables: Try pressing hard vs. soft. Try printing on dry paper vs. slightly damp paper (the paint spreads and blooms differently). Try printing the same flower twice to see how the second print is fainter.
What they’re building: Fine motor control (press, lift, repeat), visual observation, colour mixing (when prints overlap), cause and effect.
2. Leaf Stamping
Age: 18 months+
Time: 15–30 minutes
What you need: Leaves of different shapes and sizes, paint, paper, a brayer or foam roller (optional but satisfying)
How it works: Apply a thin layer of paint to the back of a leaf (the veiny side — this is where the texture is). Press the painted side onto paper. Press firmly and evenly with the flat of your hand. Peel back carefully.
The reveal moment: When you peel back the leaf and the veined print appears on the paper underneath — toddlers reliably respond to this. It’s surprising every time. The hidden structure of the leaf becomes visible. You can discuss: “These are the veins. They carry water to every part of the leaf, just like blood carries food around your body.”
Variation: Press the leaf on paper first, then paint over the top with a broad stroke. Remove the leaf to reveal a negative print — a leaf-shaped space in the colour. This is the same concept as resist printing.
What they’re building: Scientific observation (leaf structure), fine motor control, understanding of positive/negative space.
For a great leaf set: The Schylling Nature’s Wonders Magnifier Kit (approx. $14) includes a magnifier, collection box, and tweezers — great for examining leaf structure before printing.
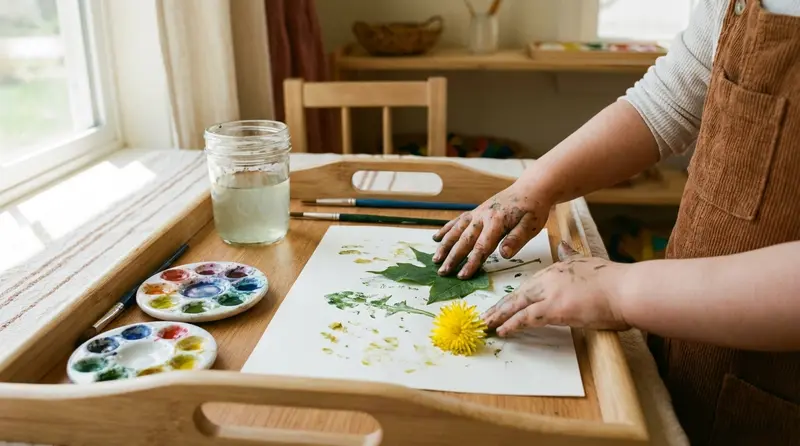
3. Sponge and Petal Painting
Age: 15 months+
Time: Open-ended
What you need: Natural sponges (sea sponge is ideal — the irregular texture is interesting), loose flower petals, paint, paper
How it works: Dip the sponge in paint and press it on the paper. The sponge’s irregular texture creates a pattern that’s entirely different from a brush — mottled, organic, interesting. Add petals to the sponge before pressing for combined petal-texture prints.
Why sea sponge: A synthetic kitchen sponge makes uniform, rectangular prints. A sea sponge makes marks that look like the natural world — irregular, interesting, different each time. This is exactly the kind of material variety Montessori advocated for: natural objects with real properties, not plastic replicas.
The Creativity Street Natural Sea Sponges (approx. $8 for a pack of three assorted sizes) are a good investment — they last for years, clean easily, and the size variety is useful.
What they’re building: Sensory exploration, understanding of texture and material properties, free exploration.
4. Watercolour on Wet Paper
Age: 2 years+
Time: 15–25 minutes
What you need: Watercolour paints, a brush, white paper, water, a sponge or cloth to pre-wet the paper
How it works: Wet the paper with a damp sponge until it’s thoroughly moist but not soaking. Let your child add drops or strokes of watercolour paint. Watch them spread and bloom across the wet paper. Add a second colour. Where they meet, they mix.
This is colour mixing without instruction. You don’t say “if you mix blue and yellow you get green.” You wet the paper. You hand over the brush. You watch together as it happens. The understanding is real because they caused it.
Natural extension: Press a flower or leaf onto the wet watercolour while it’s still damp. Remove after 30 seconds — the colour around the plant will have dried differently. The result is a slightly preserved silhouette in the colour field.
What they’re building: Observation of cause and effect, colour theory (through experience, not instruction), sensory engagement, patience.
5. Nature Texture Rubbings
Age: 2.5 years+
Time: 20–30 minutes
What you need: Leaves, bark pieces, textured seed pods, thin white paper, wax crayons (fat ones work best)
How it works: Place a leaf under the paper. Hold the paper firmly (or tape it down). Peel the paper wrapper off a fat crayon. Rub the side of the crayon over the paper above the leaf. The texture transfers through the paper. Remove the leaf. Repeat with bark or other textured materials.
Why this works developmentally: The rubbing motion requires sustained bilateral coordination — one hand holds the paper steady, one rubs the crayon. The pressure must be consistent. And the result is always slightly surprising — the child doesn’t see the texture appear until they pull the paper away. There’s genuine suspense.
Make it a collection: Use one large sheet and make texture rubbings from five or six different natural objects. When complete, lay the natural objects next to their rubbings and see if they can match each texture to its source. This is classification and observation work on top of the art.
What they’re building: Bilateral coordination, sustained concentration, scientific observation, classification.
6. Mud and Dirt Painting
Age: 18 months+
Time: Open-ended (outdoors works best)
What you need: Garden soil, water, a shallow container to mix in, large paper or cardboard, fingers or sticks for mark-making. Old clothes mandatory.
How it works: Mix soil and water to a thick, smooth paint consistency. Give your child large paper and let them paint with their hands, sticks, a flat stone, or bark. There are no brushes because brushes aren’t the point. The point is the material itself — cold, earthy, wet, heavy.
The Montessori case for mud: Montessori believed children’s senses needed real, varied materials — not sanitised, plastic versions of the world. Mud is the original sensory material. It’s cold or warm depending on the sun. It smells of the earth. It sticks differently when thick vs. thin. It dries with cracks. No craft kit comes close.
Safety note: Use garden soil from a known source. Avoid soil from areas that might have been treated with pesticides or near animal waste. Wash hands thoroughly after.
The earth pigments extension (age 3+): Different soils and clays make different colours — red clay, yellow ochre, dark peat. If you’re in an area with varied geology, collecting and comparing different soil colours makes a beautiful earth pigments palette.
What they’re building: Sensory exploration, mark-making, understanding of material properties, connection to the natural world.
7. Berry and Flower Juice Painting
Age: 2 years+ (with supervision)
Time: 20–30 minutes
What you need: Berries that stain (blackberries, elderberries, blueberries — check what’s available in your area), flower petals with pigment (beetroot flowers, marigolds, some roses), a mortar and pestle or small bowl and the back of a spoon, paper
How it works: Crush the berries or petals with a little water to release the juice. Use a brush, a cotton ball, or fingers to paint with the resulting liquid. The colours are earthy and beautiful — nothing like manufactured paint.
This is chemistry. Blackberry juice is acidic. Add a drop of lemon juice and watch the colour shift toward pink. Add a tiny pinch of bicarbonate of soda and it turns blue-green. These are real chemical reactions that toddlers can observe without any explanation. The wondering comes first; the explanation can wait years.
Note on permanence: These natural pigments fade over time. The painting that’s vibrant today will be pale in a week. That’s okay — it teaches children that things change, that the act of making matters as much as what remains.
What they’re building: Scientific curiosity, colour observation, sensory engagement (textures, smells), cause and effect.
8. Collage with Natural Materials
Age: 18 months+
Time: 20–40 minutes
What you need: Collected natural materials (dried petals, seeds, leaves, small pebbles, bark, moss fragments, dried grass), a backing paper or cardboard, a child-safe glue stick or PVA glue
How it works: Set out a collection of natural materials in small bowls or on a tray. Give your child a sheet of paper and glue. Let them arrange and stick. No template. No suggested outcome. Just the materials and the surface.
What you’ll see: Young toddlers (18-24 months) will explore the materials first — picking them up, dropping them, smelling them. They’ll apply glue randomly and press things in without arrangement intent. This is correct and valuable.
Older toddlers (2.5-3+) begin to compose — choosing materials deliberately, trying different positions before gluing. This is early spatial reasoning.
The seasonal extension: Create a “spring nature board” that changes through the season. Add to it each week as new materials become available. In the same way that a changing sensory bin teaches seasonal awareness, a living collage board makes the season tangible.
What they’re building: Sensory discrimination, fine motor control (handling small items), creative composition, seasonal awareness.
9. Resist Art with Wax Crayons and Watercolour
Age: 3 years+
Time: 20–30 minutes
What you need: White wax crayon (or any pale wax crayon), white paper, watercolour paint in a strong colour
How it works: Draw on white paper with the white wax crayon — or any crayon. For young children, just let them make marks. Then paint over the entire sheet with a thin wash of dark watercolour (dark blue, green, or purple work well). The wax resists the paint. The crayon marks appear like magic underneath.
Why this is powerful: The child puts marks on a white paper with a white crayon and nothing seems to happen. They can’t see what they’ve done. Then they paint — and their invisible marks suddenly appear. This is a reveal moment that genuinely surprises every time, even when children know it’s coming.
Natural extension: Cut leaves or flower shapes from thick wax paper or use real leaves coated in wax crayon. Place them on the paper, paint over, remove. Combine with the stamping activities above for a layered spring composition.
What they’re building: Understanding of material properties (resist), fine motor control, anticipation and patience, creative composition.
10. Pressed Flower Watercolour Backgrounds
Age: 2.5 years+
Time: 20 min activity + 1 week pressing
What you need: Collected flowers and leaves, heavy books or a flower press, white paper, watercolour paint
How it works: First session (5 minutes): Press flowers and leaves between layers of paper inside heavy books. Leave for one week.
Second session: Paint a watercolour background on paper — abstract washes of colour, no plan. Let it dry. Once dry, arrange the pressed flowers and leaves on the painted background. For age 4+, glue in place.
Why the two-session structure works: The waiting between sessions is itself a lesson — that some things take time, that you come back to work and find it transformed (the flowers are flat and preserved; the paper is dry and the colours have settled). The second session feels like returning to something, not starting from scratch.
Display: Pressed flower art in a simple frame is one of the most beautiful things you can make with a toddler. The combination of their painted background and the real, preserved flowers is genuinely lovely. This is one process art outcome worth keeping.
The Melissa & Doug Wooden Flower Press (approx. $10) is a nice investment for an ongoing pressing practice. It has thumb screws to apply even pressure, comes with paper inserts, and is sized right for small hands.
What they’re building: Patience, multi-step planning, aesthetic composition, care for natural materials.
Overview: All 10 Activities at a Glance
Process Art Activities Summary
| Activity | Min Age | Mess Level | Key Skill |
|---|---|---|---|
| Flower printing | 18m | Medium | Observation |
| Leaf stamping | 18m | Medium | Fine motor + science |
| Sponge & petal painting | 15m | Medium | Sensory exploration |
| Watercolour on wet paper | 2y | Low–Medium | Colour observation |
| Nature texture rubbings | 2.5y | Very low | Classification |
| Mud painting | 18m | Very high | Sensory / mark-making |
| Berry & flower juice | 2y | Medium | Chemistry / curiosity |
| Natural collage | 18m | Low | Composition |
| Wax resist art | 3y | Medium | Material properties |
| Pressed flower backgrounds | 2.5y | Low | Patience + planning |
How to Talk About Process Art With Your Child
The way adults respond to process art matters enormously. A few principles:
Describe instead of praise. “I can see you used a lot of blue here” is more useful than “that’s beautiful.” It tells the child that you noticed their choices, without attaching judgement.
Ask open questions. “What did it feel like when you pressed the flower?” or “What happened when the two colours mixed?” These invite reflection and vocabulary, not performance.
Resist the urge to “help.” If the leaf is upside down, the paint is too thick, or the composition looks chaotic — leave it. The child is making decisions. Those decisions are the work. Intervening teaches them to defer to your aesthetic sense instead of developing their own.
Don’t display everything. Not every piece needs to be framed. Some process art is purely process — the exploration is the point, and the paper can go to recycling. Save the pieces that feel significant. Let the child choose sometimes.
What You Actually Need to Buy (And What You Don’t)
Most process art requires almost nothing you don’t already have. But if you want to invest:
Recommended Materials
| Item | Worth Buying? | Notes |
|---|---|---|
| Crayola Washable Watercolours (approx. $5) | — Yes | Genuinely washable, good colour range, very affordable |
| Sea Sponges 3-pack (approx. $8) | — Yes | Lasts for years, interesting texture, versatile |
| Melissa & Doug Flower Press (approx. $10) | — Yes | Good size, easy thumbscrews, reusable paper inserts |
| Schylling Nature Magnifier Kit (approx. $14) | — Yes | For pre/post observation — pairs beautifully with printing activities |
| Dedicated art smock | — ï¸ Optional | An old oversized T-shirt works just as well |
| Speciality art papers | — Not needed | Plain printer paper, brown paper bags, or old newspaper all work |
| Craft kits with pre-cut materials | — No | Defeats the purpose of process art — use real materials |
FAQ
Is process art actually educational, or is it just messy play?
Both, which is exactly the point. Process art builds fine motor skills (gripping, pressing, brushing), bilateral coordination (holding paper while rubbing a crayon), scientific observation (what happens when paint gets wet?), and emotional development (tolerating ambiguity, making independent decisions, completing self-directed work). It also builds vocabulary, concentration, and spatial awareness. The mess is evidence of work — not a side effect to minimise, but an indication that real materials are being explored in real ways.
My toddler just smears everything and doesn’t actually “do” the activities. Is that okay?
Yes. For children under 2, smearing IS the activity. The goal isn’t to produce a leaf stamp — it’s to explore what paint feels like, what happens when you press your hand into it, what colour appears. Directed process activities become accessible from around 2-2.5. Before that, free sensory exploration with safe, non-toxic materials is exactly right. Set up the tray, step back, and let them investigate.
How do I manage the mess without dreading every art session?
Setup is everything. A tray with a lip contains paint spills. A smock protects clothes. Newspaper or an old tablecloth under the tray protects surfaces. If you’re genuinely bothered by mess indoors, take process art outside — a concrete patio is ideal, and the hose is the clean-up tool. The activities that work best with the least indoor mess: texture rubbings, natural collage, pressed flower work. Save mud painting and berry juice for outdoor sessions.
What’s the difference between Montessori art and regular toddler craft?
Regular toddler craft tends to be product-oriented: make this card, follow this template, produce this outcome. Montessori process art is the opposite: the material is explored freely, the child directs the work, and what comes out isn’t evaluated against an expected result. In practical terms, this means you don’t start with a plan, you don’t “help” the art toward a particular look, and you respond to the work with observation rather than praise or critique. It’s a mindset shift more than a materials shift.
Can we save and display process art? Does that contradict the “process not product” idea?
Not at all. Some process work produces genuinely beautiful results — pressed flower watercolour backgrounds, in particular, are worth framing. The principle is that the outcome shouldn’t drive the activity. You don’t set up flower printing because you want a nice print. You set it up because pressing flowers in paint is interesting. If the result happens to be lovely, you can appreciate that and save it. Just don’t let the desire for a nice result make you “help” the work along, or feel disappointed when it looks like abstract toddler art rather than a Pinterest post.
What spring flowers are safe for process art?
For printing and pressing: daisies, pansies, buttercups, violets, dandelions, and nasturtiums are all safe. For berry juice painting: blackberries and blueberries are safe; avoid elderberries for very young children (the juice can cause mild irritation in large amounts). Flowers to avoid for any handling by young children: foxglove, lily of the valley, laburnum, monkshood, and nightshade — all common garden plants that are toxic if ingested. When in doubt, stick to clearly edible flowers (dandelions, nasturtiums, violets) for activities where mouthing is a possibility.
Where curiosity leads, learning follows. ✨
 Get weekly Montessori tips
Honest reviews, activity ideas, and budget-friendly picks — no spam, just what works.
Subscribe Free